JAX-RS初探 二:整合Spring + Spring-Data-JPA


项目地址:
https://github.com/FateSolo/JSH-Test

目录:

通过上章示例可知,JAX-RS标准应属于三层架构中的表现层,与之对应的是Struts2、SpringMVC这些表现层框架。

因此,Jersey同样可以与Spring整合,享受Spring带来的全方位的便利,本章将示范整合Jersey + Spring + Spring-Data-JPA (Hibernate实现)。

1. 整合Spring

1) 打开web.xml,添加如下配置:

1
2
3
4
5
6
7
8
9
<!-- Spring -->
<context-param>
<param-name>contextConfigLocation</param-name>
<param-value>classpath:config/spring/spring-common.xml</param-value>
</context-param>

<listener>
<listener-class>org.springframework.web.context.ContextLoaderListener</listener-class>
</listener>

2) 添加Spring依赖:

1
/**
 * Jersey
 */
compile 'org.glassfish.jersey.ext:jersey-spring3:2.25.1'

/**
 * Spring
 */
compile 'org.springframework:spring-web:4.3.7.RELEASE'

其中jersey-spring3是Jersey整合Spring所必需的依赖,其本身依赖jersey-container-servlet-core,因此可替换掉jersey-container-servlet-core。

3) 在resources/config/spring目录下创建Spring配置文件spring-common.xml:

1
2
3
4
5
6
7
8
9
10
11
12
13
14
15
16
17
18
19
20
21
<?xml version="1.0" encoding="UTF-8"?>
<beans xmlns="http://www.springframework.org/schema/beans"
xmlns:xsi="http://www.w3.org/2001/XMLSchema-instance"
xmlns:context="http://www.springframework.org/schema/context"
xmlns:tx="http://www.springframework.org/schema/tx"
xmlns:jpa="http://www.springframework.org/schema/data/jpa"
xsi:schemaLocation="http://www.springframework.org/schema/beans
http://www.springframework.org/schema/beans/spring-beans.xsd
http://www.springframework.org/schema/context
http://www.springframework.org/schema/context/spring-context.xsd
http://www.springframework.org/schema/tx
http://www.springframework.org/schema/tx/spring-tx.xsd
http://www.springframework.org/schema/data/jpa
http://www.springframework.org/schema/data/jpa/spring-jpa.xsd">


<description>Spring 配置</description>

<!-- 扫描包内所有注解 -->
<context:component-scan base-package="com.fatesolo.jsh"/>

</beans>

2. 整合Spring-Data-JPA

1) 添加MySQL、Druid、Hibernate、Spring-Data-JPA依赖:

1
/**
 * Druid
 */
compile 'com.alibaba:druid:1.0.28'

/**
 * Mysql
 */
compile 'mysql:mysql-connector-java:6.0.5'

/**
 * Hibernate
 */
compile 'org.hibernate:hibernate-core:5.2.7.Final'

/**
 * Spring
 */
compile 'org.springframework:spring-orm:4.3.7.RELEASE'
compile 'org.springframework:spring-web:4.3.7.RELEASE'
compile 'org.springframework.data:spring-data-jpa:1.11.1.RELEASE'

其中spring-orm在配置JPA时要用到。

2) 在resources/config/db目录下创建db.properties,配置相关信息:

1
jdbc.url=jdbc:mysql://localhost:3306/jsh_test?useUnicode=true&characterEncoding=utf8
jdbc.username=root
jdbc.password=123456

druid.initialSize=5
druid.minIdle=5
druid.maxActive=50

hibernate.dialect=org.hibernate.dialect.MySQL5Dialect
hibernate.show_sql=true
hibernate.format_sql=true
hibernate.hbm2ddl.auto=update

3) 在spring-common.xml中配置数据源、JPA、Spring-Data-JPA:

1
2
3
4
5
6
7
8
9
10
11
12
13
14
15
16
17
18
19
20
21
22
23
24
25
26
27
28
29
30
31
32
33
34
35
36
37
38
39
40
41
42
43
44
45
46
47
48
49
50
51
52
53
54
55
56
57
58
59
60
61
62
63
64
<!-- 引入 db.properties 配置文件 -->
<context:property-placeholder location="classpath:config/db/db.properties"/>

<!-- Druid 数据源 -->
<bean id="dataSource" class="com.alibaba.druid.pool.DruidDataSource" init-method="init" destroy-method="close">
<!-- 基本属性 url、user、password -->
<property name="url" value="${jdbc.url}"/>
<property name="username" value="${jdbc.username}"/>
<property name="password" value="${jdbc.password}"/>

<!-- 配置初始化大小、最小、最大 -->
<property name="initialSize" value="${druid.initialSize}"/>
<property name="minIdle" value="${druid.minIdle}"/>
<property name="maxActive" value="${druid.maxActive}"/>

<!-- 配置获取连接等待超时的时间 -->
<property name="maxWait" value="60000"/>

<!-- 配置间隔多久才进行一次检测,检测需要关闭的空闲连接,单位是毫秒 -->
<property name="timeBetweenEvictionRunsMillis" value="60000"/>

<!-- 配置一个连接在池中最小生存的时间,单位是毫秒 -->
<property name="minEvictableIdleTimeMillis" value="300000"/>

<property name="validationQuery" value="SELECT 'x'"/>
<property name="testWhileIdle" value="true"/>
<property name="testOnBorrow" value="false"/>
<property name="testOnReturn" value="false"/>

<property name="poolPreparedStatements" value="false"/>
</bean>

<!-- JPA -->
<bean id="entityManagerFactory" class="org.springframework.orm.jpa.LocalContainerEntityManagerFactoryBean">
<property name="dataSource" ref="dataSource"/>
<property name="packagesToScan" value="com.fatesolo.jsh.entity"/>
<property name="jpaVendorAdapter" ref="jpaVendorAdapter"/>
<property name="jpaProperties">
<props>
<prop key="hibernate.dialect">${hibernate.dialect}</prop>
<prop key="hibernate.show_sql">${hibernate.show_sql}</prop>
<prop key="hibernate.format_sql">${hibernate.format_sql}</prop>
<prop key="hibernate.hbm2ddl.auto">${hibernate.hbm2ddl.auto}</prop>
</props>
</property>
</bean>

<bean id="jpaVendorAdapter" class="org.springframework.orm.jpa.vendor.HibernateJpaVendorAdapter">
<property name="generateDdl" value="false"/>
<property name="database" value="MYSQL"/>
<property name="databasePlatform" value="org.hibernate.dialect.MySQL5InnoDBDialect"/>
</bean>

<!-- 配置 JPA 事务 -->
<bean id="transactionManager" class="org.springframework.orm.jpa.JpaTransactionManager">
<property name="entityManagerFactory" ref="entityManagerFactory"/>
</bean>

<tx:annotation-driven transaction-manager="transactionManager"/>

<!-- Spring Data JPA -->
<jpa:repositories base-package="com.fatesolo.jsh.repository"
transaction-manager-ref="transactionManager"
entity-manager-factory-ref="entityManagerFactory"/>

3. 编写基础代码

1) 改造实体Book,在类名上增加相关注解

1
2
3
4
@Entity
@Table(name = "book")
@XmlRootElement
public class Book {

在字段上增加相关注解

1
2
3
4
5
6
7
8
9
@Id
@GeneratedValue(strategy = GenerationType.IDENTITY)
private int id;

@Column(nullable = false)
private String name;

@Column(nullable = false)
private String author;

2) 建立repository子包,并创建BookRepository类:

1
2
3
4
5
6
7
8
9
10
11
12
13
14
15
16
17
package com.fatesolo.jsh.repository;

import com.fatesolo.jsh.entity.Book;
import org.springframework.data.repository.RepositoryDefinition;

import java.util.List;

@RepositoryDefinition(domainClass = Book.class, idClass = Integer.class)
public interface BookRepository {

Book findById(int id);

List<Book> findAll();

void save(Book book);

}

3) 建立service子包,并创建BookService类:

1
2
3
4
5
6
7
8
9
10
11
12
13
14
15
16
17
18
19
20
21
22
23
24
25
26
27
28
29
30
31
32
package com.fatesolo.jsh.service;

import com.fatesolo.jsh.repository.BookRepository;
import com.fatesolo.jsh.entity.Book;
import org.springframework.stereotype.Service;
import org.springframework.transaction.annotation.Transactional;

import javax.annotation.Resource;
import java.util.List;

@Service
@Transactional(rollbackFor = Exception.class)
public class BookService {

@Resource
private BookRepository repository;

public Book getBookById(int id) {
return repository.findById(id);
}

public List<Book> getBooks() {
return repository.findAll();
}

public boolean addBook(Book book) {
repository.save(book);

return book.getId() != 0;
}

}

4) 改造资源BookResource,增加@Controller注解(事实上也可以使用@Component,在不使用SpringMVC的情况下,增加@Controller仅仅是为了将该类声明为由Spring容器管理的一个bean,以支持注入Service层),并访问service层方法:

1
2
3
4
5
6
7
8
9
10
11
12
13
14
15
16
17
18
19
20
21
22
23
24
25
26
27
28
29
30
31
32
33
34
35
36
37
38
39
40
package com.fatesolo.jsh.resource;

import com.fatesolo.jsh.entity.Book;
import com.fatesolo.jsh.entity.Result;
import com.fatesolo.jsh.service.BookService;
import org.springframework.stereotype.Controller;

import javax.annotation.Resource;
import javax.ws.rs.*;
import javax.ws.rs.core.MediaType;
import java.util.List;

@Controller
@Path("/book")
@Consumes(MediaType.APPLICATION_XML)
@Produces(MediaType.APPLICATION_XML)
public class BookResource {

@Resource
private BookService service;

@GET
@Path("/{id}")
public Book getBookById(@PathParam("id") int id) {
return service.getBookById(id);
}

@GET
@Path("/")
public List<Book> getBooks() {
return service.getBooks();
}

@POST
@Path("/")
public Result addBook(Book book) {
return service.addBook(book) ? Result.success() : Result.failure();
}

}

4. 项目运行:

1) 使用Tomcat 8运行项目,使用curl工具添加一条数据:

1
curl -H "Content-Type:application/xml" -d "<book><name>Book</name><author>Fate</author></book>" http://localhost:8080/rest/book

得到如下返回:

1
2
3
<result>
<code>SUCCESS</code>
</result>

2) 访问http://localhost:8080/rest/book/1 ,得到如下结果:

1
2
3
4
5
<book>
<author>Fate</author>
<id>1</id>
<name>Book</name>
</book>

3) 访问http://localhost:8080/rest/book ,得到如下结果:

1
2
3
4
5
6
7
<books>
<book>
<author>Fate</author>
<id>1</id>
<name>Book</name>
</book>
</books>

至此,Jersey + Spring + Spring-Data-JPA整合完成。


作者 [@FateSolo]
2017 年 03月 22日

JAX-RS初探 一:搭建Jersey框架


项目地址:
https://github.com/FateSolo/JSH-Test

目录:

JAX-RS(JSR-311 & JSR-339标准),全称Java API for RESTful Web Services,旨在定义一个统一的规范,使得Java程序员可以使用一套固定的接口来开发RESTful应用,避免了依赖于第三方框架。

RESTful,全称Representational State Transfer,是一种网络服务设计风格,将所有的URI都视为资源,在URI中只包含名词而没有动词,以HTTP的四种方法来对资源进行操作。

JAX-RS与JPA类似,都是标准却没有实现,需要第三方来提供具体实现,而Jersey框架就是Sun公司推出的JSR-311的参考实现,本章将使用Jersey框架搭建一个RESTful服务。

项目环境:

  • Ubuntu 14.04.3
  • Intellij IDEA 15.0.2

1. 项目搭建:

1) 打开IDEA,点击Create New Project,在左侧边栏找到Gradle,并勾选Java和Web,JDK选择1.8。

2) 点击Next,GroupId:com.fatesolo;ArtifactId:JSH-Test。

3) 点击Next,勾选Use auto-import和Create directories for…。

4) 点击Next,直接Finish即完成了项目的创建。

2. 配置依赖

1) 打开build.gradle文件, 在dependencies中,加入Jersey相关依赖:

1
/**
 * Jersey
 */
compile 'org.glassfish.jersey.containers:jersey-container-servlet-core:2.25.1'

3. 编写web.xml

1) 打开web.xml,编写如下配置:

1
2
3
4
5
6
7
8
9
10
11
12
13
14
15
16
17
18
19
20
21
22
23
24
25
26
27
28
29
30
31
32
33
<?xml version="1.0" encoding="UTF-8"?>
<web-app xmlns="http://java.sun.com/xml/ns/javaee"
xmlns:xsi="http://www.w3.org/2001/XMLSchema-instance"
xsi:schemaLocation="http://java.sun.com/xml/ns/javaee
http://java.sun.com/xml/ns/javaee/web-app_3_0.xsd"

version="3.0">


<display-name>JSH-Test</display-name>

<context-param>
<param-name>webAppRootKey</param-name>
<param-value>JSH-Test.root</param-value>
</context-param>

<!-- Jersey -->
<servlet>
<servlet-name>Jersey</servlet-name>
<servlet-class>org.glassfish.jersey.servlet.ServletContainer</servlet-class>

<init-param>
<param-name>javax.ws.rs.Application</param-name>
<param-value>com.fatesolo.jsh.application.Application</param-value>
</init-param>

<load-on-startup>1</load-on-startup>
</servlet>

<servlet-mapping>
<servlet-name>Jersey</servlet-name>
<url-pattern>/rest/*</url-pattern>
</servlet-mapping>

</web-app>

4. 编写基础代码

1) 在com.fatesolo.jsh下建立application子包,并创建Application类,继承ResourceConfig,用来注册Jersey下的各种资源:

1
2
3
4
5
6
7
8
9
10
11
package com.fatesolo.jsh.application;

import org.glassfish.jersey.server.ResourceConfig;

public class Application extends ResourceConfig {

public Application() {

}

}

2) 建立entity子包,存放实体,这里以书籍Book为例,编写Book的实体代码:

1
2
3
4
5
6
7
8
9
10
11
12
13
14
15
16
17
18
19
20
21
22
23
24
25
26
27
28
29
30
31
32
33
34
35
package com.fatesolo.jsh.entity;

public class Book {

private int id;

private String name;

private String author;

public int getId() {
return id;
}

public void setId(int id) {
this.id = id;
}

public String getName() {
return name;
}

public void setName(String name) {
this.name = name;
}

public String getAuthor() {
return author;
}

public void setAuthor(String author) {
this.author = author;
}

}

3) 再创建Result类,作为请求的响应实体:

1
2
3
4
5
6
7
8
9
10
11
12
13
14
15
16
17
18
19
20
21
22
23
24
25
26
27
28
29
30
31
32
33
34
35
36
37
38
39
40
41
42
43
44
45
46
47
48
49
50
51
package com.fatesolo.jsh.entity;

public class Result {

private String code;

private String msg;

public String getCode() {
return code;
}

public void setCode(String code) {
this.code = code;
}

public String getMsg() {
return msg;
}

public void setMsg(String msg) {
this.msg = msg;
}

public static Result success(String msg) {
Result result = new Result();

result.setCode("SUCCESS");
result.setMsg(msg);

return result;
}

public static Result success() {
return success(null);
}

public static Result failure(String msg) {
Result result = new Result();

result.setCode("FAILURE");
result.setMsg(msg);

return result;
}

public static Result failure() {
return failure(null);
}

}

4) 建立resource子包,并创建BookResource类,编写如下代码:

1
2
3
4
5
6
7
8
9
10
11
12
13
14
15
16
17
18
19
20
21
22
23
24
25
26
27
28
29
30
31
32
33
34
35
36
37
38
39
40
41
42
43
package com.fatesolo.jsh.resource;

import com.fatesolo.jsh.entity.Book;
import com.fatesolo.jsh.entity.Result;

import javax.ws.rs.*;
import javax.ws.rs.core.MediaType;
import java.util.ArrayList;
import java.util.List;

@Path("/book")
@Consumes(MediaType.APPLICATION_XML)
@Produces(MediaType.APPLICATION_XML)
public class BookResource {

@GET
@Path("/{id}")
public Book getBookById(@PathParam("id") int id) {
Book book = new Book();
book.setId(id);
book.setName("Book " + id);
book.setAuthor("Author " + id);
return book;
}

@GET
@Path("/")
public List<Book> getBooks() {
List<Book> books = new ArrayList<>();
books.add(getBookById(1));
books.add(getBookById(2));
books.add(getBookById(3));

return books;
}

@POST
@Path("/")
public Result addBook(Book book) {
return Result.success(book.getName());
}

}

这里只是简单new了一个实体作为返回,方便测试。

5) 资源类若想被访问到,需要在Application类中注册,在Application的默认构造函数中增加如下代码:

1
register(BookResource.class);

6) 在BookResource中,@Consumes和@Produces分别限定了Content-Type和Accept的类型,这里限定只接受和返回xml类型数据,所以要在User和Result两个实体类上加xml注解:

1
@XmlRootElement

5. 项目运行:

1) 使用Tomcat 8运行项目,使用curl工具添加一条数据:

1
curl -H "Content-Type:application/xml" -d "<book><name>Book</name><author>Fate</author></book>" http://localhost:8080/rest/book

得到如下返回:

1
2
3
4
<result>
<code>SUCCESS</code>
<msg>Book</msg>
</result>

2) 访问http://localhost:8080/rest/book/1 ,得到如下结果:

1
2
3
4
5
<book>
<author>Author 1</author>
<id>1</id>
<name>Book 1</name>
</book>

3) 访问http://localhost:8080/rest/book ,得到如下结果:

1
2
3
4
5
6
7
8
9
10
11
12
13
14
15
16
17
<books>
<book>
<author>Author 1</author>
<id>1</id>
<name>Book 1</name>
</book>
<book>
<author>Author 2</author>
<id>2</id>
<name>Book 2</name>
</book>
<book>
<author>Author 3</author>
<id>3</id>
<name>Book 3</name>
</book>
</books>

至此,Jersey框架搭建完毕。


作者 [@FateSolo]
2017 年 03月 22日

DAO层实现示例 六:Spring-Data-JPA


项目地址:
https://github.com/FateSolo/DAO-Test

目录:

该系列文章将展示六种不同的DAO层实现方法并总结其不同,本章使用Spring-Data-JPA完成DAO操作。

1. 示例代码:

1) 在spring-common.xml中,配置Spring-Data-JPA:

1
2
3
4
<!-- Spring Data JPA -->
<jpa:repositories base-package="com.fatesolo.dao.impl"
transaction-manager-ref="transactionManager"
entity-manager-factory-ref="entityManagerFactory"/>

在文件开头的beans标签内添加一个xmlns:

1
xmlns:jpa="http://www.springframework.org/schema/data/jpa"

在xsi:schemaLocation中添加:

1
2
http://www.springframework.org/schema/data/jpa
http://www.springframework.org/schema/data/jpa/spring-jpa.xsd

2) 在build.gradle中,添加Spring-Data-JPA依赖:

1
compile 'org.springframework.data:spring-data-jpa:1.11.1.RELEASE'

3) 在dao.impl包中创建BookDaoSpringDataJpaImpl.java,编写如下代码:

1
2
3
4
5
6
7
8
9
10
11
package com.fatesolo.dao.impl;

import com.fatesolo.dao.BookDao;
import com.fatesolo.entity.Book;
import org.springframework.data.repository.RepositoryDefinition;
import org.springframework.stereotype.Repository;

@Repository("bookDaoSpringDataJpaImpl")
@RepositoryDefinition(domainClass = Book.class, idClass = Integer.class)
public interface BookDaoSpringDataJpaImpl extends BookDao {
}

4) 打开BookService.java,修改成员变量bookDao的注解:

1
@Resource(name = "bookDaoSpringDataJpaImpl")

2. 项目运行:

1) 使用Tomcat 8运行项目,使用curl工具添加一条数据:

1
curl -d "name=Test6&author=Fate" http://localhost:8080/book

得到如下返回:

1
Book{id=6, name='Test6', author='Fate'}

2) 访问http://localhost:8080/book/6 ,得到如下结果:

1
Book{id=6, name='Test6', author='Fate'}

3) 访问http://localhost:8080/book/name/Test ,得到如下结果:

1
[Book{id=1, name='Test1', author='Fate'}, Book{id=2, name='Test2', author='Fate'}, Book{id=3, name='Test3', author='Fate'}, Book{id=4, name='Test4', author='Fate'}, Book{id=5, name='Test5', author='Fate'}, Book{id=6, name='Test6', author='Fate'}]

3. 总结

就像Spring的JdbcTemplate是对原生Jdbc的封装,Spring-Data-JPA也是Spring对JPA的封装。

可以看到,Spring-Data-JPA已经做到了简化的极致,开发者无需实现任何逻辑代码和sql语句,仅仅继承了BookDao接口并添加了@RepositoryDefinition注解 (或者继承org.springframework.data.repository.Repository及其子接口),就完成了DAO的操作。

Spring-Data-JPA是根据声明方法的命名来自动实现逻辑代码的,findById、findByNameContaining、save等都符合了其命名规则,开发者无需再自行实现。关于具体的命名规则,请参阅Spring官方文档


作者 [@FateSolo]
2017 年 03月 12日

DAO层实现示例 五:JPA


项目地址:
https://github.com/FateSolo/DAO-Test

目录:

该系列文章将展示六种不同的DAO层实现方法并总结其不同,本章使用JPA (Hibernate实现) 完成DAO操作。

1. 示例代码:

1) 在spring-common.xml中,配置JPA的EntityManagerFactory:

1
2
3
4
5
6
7
8
9
10
11
12
13
14
15
16
17
18
19
20
<!-- JPA -->
<bean id="entityManagerFactory" class="org.springframework.orm.jpa.LocalContainerEntityManagerFactoryBean">
<property name="dataSource" ref="dataSource"/>
<property name="packagesToScan" value="com.fatesolo.entity"/>
<property name="jpaVendorAdapter" ref="jpaVendorAdapter"/>
<property name="jpaProperties">
<props>
<prop key="hibernate.dialect">org.hibernate.dialect.MySQL5Dialect</prop>
<prop key="hibernate.show_sql">true</prop>
<prop key="hibernate.format_sql">true</prop>
<prop key="hibernate.hbm2ddl.auto">update</prop>
</props>
</property>
</bean>

<bean id="jpaVendorAdapter" class="org.springframework.orm.jpa.vendor.HibernateJpaVendorAdapter">
<property name="generateDdl" value="false"/>
<property name="database" value="MYSQL"/>
<property name="databasePlatform" value="org.hibernate.dialect.MySQL5InnoDBDialect"/>
</bean>

注释掉Hibernate的事务管理器,并配置JPA的事务管理器

1
2
3
4
5
6
<!-- 配置 JPA 事务 -->
<bean id="transactionManager" class="org.springframework.orm.jpa.JpaTransactionManager">
<property name="entityManagerFactory" ref="entityManagerFactory"/>
</bean>

<tx:annotation-driven transaction-manager="transactionManager"/>

2) 在dao.impl包中创建BookDaoJpaImpl.java,编写如下代码:

1
2
3
4
5
6
7
8
9
10
11
12
13
14
15
16
17
18
19
20
21
22
23
24
25
26
27
28
29
30
31
32
33
34
package com.fatesolo.dao.impl;

import com.fatesolo.dao.BookDao;
import com.fatesolo.entity.Book;
import org.springframework.stereotype.Repository;

import javax.persistence.EntityManager;
import javax.persistence.PersistenceContext;
import java.util.List;

@Repository("bookDaoJpaImpl")
public class BookDaoJpaImpl implements BookDao {

@PersistenceContext(unitName = "entityManagerFactory")
private EntityManager entityManager;

@Override
public Book findById(int id) {
return entityManager.find(Book.class, id);
}

@Override
public List<Book> findByNameContaining(String name) {
return entityManager.createQuery("select b from Book b where b.name like ?", Book.class)
.setParameter(0, "%" + name + "%")
.getResultList();
}

@Override
public void save(Book book) {
entityManager.persist(book);
}

}

3) 打开BookService.java,修改成员变量bookDao的注解:

1
@Resource(name = "bookDaoJpaImpl")

2. 项目运行:

1) 使用Tomcat 8运行项目,使用curl工具添加一条数据:

1
curl -d "name=Test5&author=Fate" http://localhost:8080/book

得到如下返回:

1
Book{id=5, name='Test5', author='Fate'}

2) 访问http://localhost:8080/book/5 ,得到如下结果:

1
Book{id=5, name='Test5', author='Fate'}

3) 访问http://localhost:8080/book/name/Test ,得到如下结果:

1
[Book{id=1, name='Test1', author='Fate'}, Book{id=2, name='Test2', author='Fate'}, Book{id=3, name='Test3', author='Fate'}, Book{id=4, name='Test4', author='Fate'}, Book{id=5, name='Test5', author='Fate'}]

3. 总结

JPA是JSR-220标准的一部分,本身并不提供实现,只是统一规范了API,而Hibernate已经支持了JPA标准,所以可以作为其具体实现。

可以看到JPA使用EntityManager进行的操作和Hibernate使用SessionFactory类似,但因为其是统一的标准,所以如果要更换其实现时,逻辑代码无需改动,只需在配置文件中修改即可,而如果使用的是Hibernate自己的API的话,当要更换ORM框架时,要进行大量的逻辑代码改动。


作者 [@FateSolo]
2017 年 03月 12日

DAO层实现示例 四:Hibernate框架


项目地址:
https://github.com/FateSolo/DAO-Test

目录:

该系列文章将展示六种不同的DAO层实现方法并总结其不同,本章使用Hibernate框架完成DAO操作。

1. 示例代码:

1) 在spring-common.xml中,配置Hibernate:

1
2
3
4
5
6
7
8
9
10
11
12
13
14
<!-- Hibernate -->
<bean id="sessionFactory" class="org.springframework.orm.hibernate5.LocalSessionFactoryBean">
<property name="dataSource" ref="dataSource"/>
<property name="packagesToScan" value="com.fatesolo.entity"/>

<property name="hibernateProperties">
<props>
<prop key="hibernate.dialect">org.hibernate.dialect.MySQL5Dialect</prop>
<prop key="hibernate.show_sql">true</prop>
<prop key="hibernate.format_sql">true</prop>
<prop key="hibernate.hbm2ddl.auto">update</prop>
</props>
</property>
</bean>

注释掉原先的事务管理器txManager,并配置Hibernate的事务管理器transactionManager

1
2
3
4
5
6
<!-- 配置 Hibernate 事务 -->
<bean id="transactionManager" class="org.springframework.orm.hibernate5.HibernateTransactionManager">
<property name="sessionFactory" ref="sessionFactory"/>
</bean>

<tx:annotation-driven transaction-manager="transactionManager"/>

2) 在build.gradle中,添加Hibernate依赖:

1
compile 'org.hibernate:hibernate-core:5.2.7.Final'

3) 在dao.impl包中创建BookDaoHibernateImpl.java,编写如下代码:

1
2
3
4
5
6
7
8
9
10
11
12
13
14
15
16
17
18
19
20
21
22
23
24
25
26
27
28
29
30
31
32
33
34
35
package com.fatesolo.dao.impl;

import com.fatesolo.dao.BookDao;
import com.fatesolo.entity.Book;
import org.hibernate.SessionFactory;
import org.springframework.stereotype.Repository;

import javax.annotation.Resource;
import java.util.List;

@Repository("bookDaoHibernateImpl")
public class BookDaoHibernateImpl implements BookDao {

@Resource
private SessionFactory sessionFactory;

@Override
public Book findById(int id) {
return sessionFactory.getCurrentSession().get(Book.class, id);
}

@Override
public List<Book> findByNameContaining(String name) {
return sessionFactory.getCurrentSession()
.createQuery("from Book where name like ?", Book.class)
.setParameter(0, "%" + name + "%")
.list();
}

@Override
public void save(Book book) {
sessionFactory.getCurrentSession().save(book);
}

}

4) 打开Book.java,修改代码如下:

1
2
3
4
5
6
7
8
9
10
11
12
13
14
15
16
17
18
19
20
21
22
23
24
25
26
27
28
29
30
31
32
33
34
35
36
37
38
39
40
41
42
43
44
45
46
47
48
49
50
51
52
package com.fatesolo.entity;

import javax.persistence.*;

@Entity
@Table(name = "book")
public class Book {

@Id
@GeneratedValue(strategy = GenerationType.IDENTITY)
private int id;

@Column(nullable = false)
private String name;

@Column(nullable = false)
private String author;

public int getId() {
return id;
}

public void setId(int id) {
this.id = id;
}

public String getName() {
return name;
}

public void setName(String name) {
this.name = name;
}

public String getAuthor() {
return author;
}

public void setAuthor(String author) {
this.author = author;
}

@Override
public String toString() {
return "Book{" +
"id=" + id +
", name='" + name + '\'' +
", author='" + author + '\'' +
'}';
}

}

5) 打开BookService.java,修改成员变量bookDao的注解:

1
@Resource(name = "bookDaoHibernateImpl")

2. 项目运行:

1) 使用Tomcat 8运行项目,使用curl工具添加一条数据:

1
curl -d "name=Test4&author=Fate" http://localhost:8080/book

得到如下返回:

1
Book{id=4, name='Test4', author='Fate'}

2) 访问http://localhost:8080/book/4 ,得到如下结果:

1
Book{id=4, name='Test4', author='Fate'}

3) 访问http://localhost:8080/book/name/Test ,得到如下结果:

1
[Book{id=1, name='Test1', author='Fate'}, Book{id=2, name='Test2', author='Fate'}, Book{id=3, name='Test3', author='Fate'}, Book{id=4, name='Test4', author='Fate'}]

3. 总结

Hibernate是经典的ORM框架,使用Hibernate,彻底完成了实体与表的映射,开发者无需再编写sql (某些情况下仍需要编写少量的hql语句)。


作者 [@FateSolo]
2017 年 03月 12日

DAO层实现示例 三:Mybatis框架


项目地址:
https://github.com/FateSolo/DAO-Test

目录:

该系列文章将展示六种不同的DAO层实现方法并总结其不同,本章使用Mybatis框架完成DAO操作。

1. 示例代码:

1) 在spring-common.xml中,配置Mybatis:

1
2
3
4
5
6
7
8
9
10
11
<!-- Mybatis -->
<bean id="sqlSessionFactory" class="org.mybatis.spring.SqlSessionFactoryBean">
<property name="dataSource" ref="dataSource"/>
<property name="typeAliasesPackage" value="com.fatesolo.entity"/>
<property name="mapperLocations" value="classpath:mapper/*Impl.xml"/>
</bean>

<bean class="org.mybatis.spring.mapper.MapperScannerConfigurer">
<property name="basePackage" value="com.fatesolo.dao.impl"/>
<property name="sqlSessionFactoryBeanName" value="sqlSessionFactory"/>
</bean>

2) 在build.gradle中,添加Mybatis依赖:

1
compile 'org.mybatis:mybatis:3.4.2'
compile 'org.mybatis:mybatis-spring:1.3.1'

3) 在dao.impl包中创建BookDaoMybatisImpl.java,编写如下代码:

1
2
3
4
5
6
7
8
package com.fatesolo.dao.impl;

import com.fatesolo.dao.BookDao;
import org.springframework.stereotype.Repository;

@Repository("bookDaoMybatisImpl")
public interface BookDaoMybatisImpl extends BookDao {
}

4) 在Resource文件夹下添加子目录mapper,创建并编写BookDaoMybatisImpl.xml:

1
2
3
4
5
6
7
8
9
10
11
12
13
14
15
16
17
18
<?xml version="1.0" encoding="UTF-8"?>
<!DOCTYPE mapper PUBLIC "-//mybatis.org//DTD Mapper 3.0//EN" "http://mybatis.org/dtd/mybatis-3-mapper.dtd">

<mapper namespace="com.fatesolo.dao.impl.BookDaoMybatisImpl">

<select id="findById" parameterType="int" resultType="Book">
select id, name, author from book where id = #{id}
</select>

<select id="findByNameContaining" parameterType="java.lang.String" resultType="Book">
select id, name, author from book where name like concat('%', #{name}, '%')
</select>

<insert id="save" parameterType="Book" useGeneratedKeys="true" keyProperty="id">
insert into book(name, author) values(#{name}, #{author})
</insert>

</mapper>

5) 打开BookService.java,修改成员变量bookDao的注解:

1
@Resource(name = "bookDaoMybatisImpl")

2. 项目运行:

1) 使用Tomcat 8运行项目,使用curl工具添加一条数据:

1
curl -d "name=Test3&author=Fate" http://localhost:8080/book

得到如下返回:

1
Book{id=3, name='Test3', author='Fate'}

2) 访问http://localhost:8080/book/3 ,得到如下结果:

1
Book{id=3, name='Test3', author='Fate'}

3) 访问http://localhost:8080/book/name/Test ,得到如下结果:

1
[Book{id=1, name='Test1', author='Fate'}, Book{id=2, name='Test2', author='Fate'}, Book{id=3, name='Test3', author='Fate'}]

3. 总结

Mybatis是轻量级的持久层框架,通过在xml文件中编写sql并与Mapper接口映射,完成DAO层操作。

可以看到使用Mybatis,开发者无需再手动建立实体与表的关系,Mybatis会自动完成实体成员变量与表字段的映射,具备了ORM特性,但仍需要手动编写sql。


作者 [@FateSolo]
2017 年 03月 12日

DAO层实现示例 二:JdbcTemplate


项目地址:
https://github.com/FateSolo/DAO-Test

目录:

该系列文章将展示六种不同的DAO层实现方法并总结其不同,本章使用Spring提供的JdbcTemplate完成DAO操作。

1. 示例代码:

1) 在spring-common.xml中,配置JdbcTemplate:

1
2
3
4
<!-- Spring Jdbc Template -->
<bean id="jdbcTemplate" class="org.springframework.jdbc.core.JdbcTemplate">
<property name="dataSource" ref="dataSource"/>
</bean>

2) 在dao.impl包中创建BookDaoJdbcTemplateImpl.java,编写如下代码:

1
2
3
4
5
6
7
8
9
10
11
12
13
14
15
16
17
18
19
20
21
22
23
24
25
26
27
28
29
30
31
32
33
34
35
36
37
38
39
40
41
42
43
44
45
46
47
48
49
50
51
52
53
54
55
56
57
58
59
60
61
62
63
64
65
package com.fatesolo.dao.impl;

import com.fatesolo.dao.BookDao;
import com.fatesolo.entity.Book;
import org.springframework.jdbc.core.JdbcTemplate;
import org.springframework.jdbc.support.GeneratedKeyHolder;
import org.springframework.jdbc.support.KeyHolder;
import org.springframework.stereotype.Repository;

import javax.annotation.Resource;
import java.sql.PreparedStatement;
import java.util.List;

@Repository("bookDaoJdbcTemplateImpl")
public class BookDaoJdbcTemplateImpl implements BookDao {

@Resource
private JdbcTemplate jdbcTemplate;

@Override
public Book findById(int id) {
String sql = "select name, author from book where id = ?";

return jdbcTemplate.queryForObject(sql, new Object[]{id}, (rs, rowNum) -> {
Book book = new Book();
book.setId(id);
book.setName(rs.getString("name"));
book.setAuthor(rs.getString("author"));

return book;
});
}

@Override
public List<Book> findByNameContaining(String name) {
String sql = "select id, name, author from book where name like ?";

return jdbcTemplate.query(sql, new Object[]{"%" + name + "%"}, (rs, rowNum) -> {
Book book = new Book();
book.setId(rs.getInt("id"));
book.setName(rs.getString("name"));
book.setAuthor(rs.getString("author"));

return book;
});
}

@Override
public void save(Book book) {
String sql = "insert into book(name, author) values(?, ?)";
KeyHolder keyHolder = new GeneratedKeyHolder();

jdbcTemplate.update(con -> {
PreparedStatement ps = con.prepareStatement(sql, PreparedStatement.RETURN_GENERATED_KEYS);

ps.setString(1, book.getName());
ps.setString(2, book.getAuthor());

return ps;
}, keyHolder);

book.setId(keyHolder.getKey().intValue());
}

}

3) 打开BookService.java,修改成员变量bookDao的注解:

1
@Resource(name = "bookDaoJdbcTemplateImpl")

2. 项目运行:

1) 使用Tomcat 8运行项目,使用curl工具添加一条数据:

1
curl -d "name=Test2&author=Fate" http://localhost:8080/book

得到如下返回:

1
Book{id=2, name='Test2', author='Fate'}

2) 访问http://localhost:8080/book/2 ,得到如下结果:

1
Book{id=2, name='Test2', author='Fate'}

3) 访问http://localhost:8080/book/name/Test ,得到如下结果:

1
[Book{id=1, name='Test1', author='Fate'}, Book{id=2, name='Test2', author='Fate'}]

3. 总结

Spring提供的JdbcTemplate是对原生Jdbc的封装,只需要简单的为其注入DateSource即可使用。

可以看到使用JdbcTemplate,开发者无需再手动编写对连接的获取与释放、异常处理等操作,只关注具体的逻辑代码即可,但仍然需要手动建立实体与表的关系,不具有ORM特性。


作者 [@FateSolo]
2017 年 03月 12日

DAO层实现示例 一:原生Jdbc


项目地址:
https://github.com/FateSolo/DAO-Test

目录:

该系列文章将展示六种不同的DAO层实现方法并总结其不同,本章使用JDK提供的原生级Jdbc完成DAO操作。

1. 示例代码:

1) 在dao包下创建子包impl,用来存放BookDao接口的不同实现类。

2) 创建BookDaoJdbcImpl.java,编写如下代码:

1
2
3
4
5
6
7
8
9
10
11
12
13
14
15
16
17
18
19
20
21
22
23
24
25
26
27
28
29
30
31
32
33
34
35
36
37
38
39
40
41
42
43
44
45
46
47
48
49
50
51
52
53
54
55
56
57
58
59
60
61
62
63
64
65
66
67
68
69
70
71
72
73
74
75
76
77
78
79
80
81
82
83
84
85
86
87
88
89
90
91
92
93
94
95
96
97
98
99
100
101
102
103
104
105
106
107
108
109
110
111
112
113
114
115
116
117
118
119
120
121
122
123
124
125
126
127
128
129
130
131
132
133
134
135
136
137
138
139
140
141
142
143
144
145
146
147
148
149
150
151
152
153
154
155
156
157
158
159
160
161
162
163
164
package com.fatesolo.dao.impl;

import com.fatesolo.dao.BookDao;
import com.fatesolo.entity.Book;
import org.springframework.stereotype.Repository;

import javax.annotation.Resource;
import javax.sql.DataSource;
import java.sql.*;
import java.util.ArrayList;
import java.util.List;

@Repository("bookDaoJdbcImpl")
public class BookDaoJdbcImpl implements BookDao {

@Resource
private DataSource dataSource;

@Override
public Book findById(int id) {
Connection connection = null;
PreparedStatement statement = null;
ResultSet rs = null;

String sql = "select name, author from book where id = ?";

try {
connection = dataSource.getConnection();

statement = connection.prepareStatement(sql);
statement.setInt(1, id);

rs = statement.executeQuery();
if (rs.next()) {
Book book = new Book();
book.setId(id);
book.setName(rs.getString("name"));
book.setAuthor(rs.getString("author"));

return book;
}
} catch (SQLException e) {
e.printStackTrace();
} finally {
if (rs != null) {
try {
rs.close();
} catch (SQLException ignored) {
}
}
if (statement != null) {
try {
statement.close();
} catch (SQLException ignored) {
}
}
if (connection != null) {
try {
connection.close();
} catch (SQLException ignored) {
}
}
}

return null;
}

@Override
public List<Book> findByNameContaining(String name) {
Connection connection = null;
PreparedStatement statement = null;
ResultSet rs = null;

String sql = "select id, name, author from book where name like ?";

List<Book> books = new ArrayList<>();

try {
connection = dataSource.getConnection();

statement = connection.prepareStatement(sql);
statement.setString(1, "%" + name + "%");

rs = statement.executeQuery();
while (rs.next()) {
Book book = new Book();
book.setId(rs.getInt("id"));
book.setName(rs.getString("name"));
book.setAuthor(rs.getString("author"));

books.add(book);
}
} catch (SQLException e) {
e.printStackTrace();
} finally {
if (rs != null) {
try {
rs.close();
} catch (SQLException ignored) {
}
}
if (statement != null) {
try {
statement.close();
} catch (SQLException ignored) {
}
}
if (connection != null) {
try {
connection.close();
} catch (SQLException ignored) {
}
}
}

return books;
}

@Override
public void save(Book book) {
Connection connection = null;
PreparedStatement statement = null;
ResultSet rs = null;

String sql = "insert into book(name, author) values(?, ?)";

try {
connection = dataSource.getConnection();

statement = connection.prepareStatement(sql, Statement.RETURN_GENERATED_KEYS);
statement.setString(1, book.getName());
statement.setString(2, book.getAuthor());

statement.executeUpdate();

rs = statement.getGeneratedKeys();
if (rs.next()) {
book.setId(rs.getInt(1));
}
} catch (SQLException e) {
e.printStackTrace();
} finally {
if (rs != null) {
try {
rs.close();
} catch (SQLException ignored) {
}
}
if (statement != null) {
try {
statement.close();
} catch (SQLException ignored) {
}
}
if (connection != null) {
try {
connection.close();
} catch (SQLException ignored) {
}
}
}
}

}

3) 打开BookService.java,修改成员变量bookDao的注解:

1
@Resource(name = "bookDaoJdbcImpl")

2. 项目运行:

1) 使用Tomcat 8运行项目,使用curl工具添加一条数据:

1
curl -d "name=Test1&author=Fate" http://localhost:8080/book

得到如下返回:

1
Book{id=1, name='Test1', author='Fate'}

2) 访问http://localhost:8080/book/1 ,得到如下结果:

1
Book{id=1, name='Test1', author='Fate'}

3) 访问http://localhost:8080/book/name/Test ,得到如下结果:

1
[Book{id=1, name='Test1', author='Fate'}]

3. 总结

使用JDK提供的原生Jdbc,无需多余配置,可以直接使用DriverManager.getConnection,更推荐的是注入在spring-common.xml配置的DataSource,可以有不同的连接池实现,如druid、c3p0、dbcp等。

但可以看到代码中,开发者真正关注的逻辑代码只占一部分,剩下的都是对获取数据库连接、关闭连接、异常处理等操作,占据了较大的篇幅,并且每一个方法都需要进行这些相同的操作。在接下来的实现方式中,这些操作将被隐藏。


作者 [@FateSolo]
2017 年 03月 12日

DAO层实现示例 序


项目地址:
https://github.com/FateSolo/DAO-Test

目录:

该系列文章将展示六种不同的DAO层实现方法并总结其不同,本章将首先完成项目总体结构的搭建。

项目环境:

  • Ubuntu 14.04.3
  • Intellij IDEA 15.0.2

1. 项目搭建:

1) 打开IDEA,点击Create New Project,在左侧边栏找到Gradle,并勾选Java和Web,JDK选择1.8。

2) 点击Next,GroupId:com.fatesolo;ArtifactId:DAO-Test。

3) 点击Next,勾选Use auto-import和Create directories for…。

4) 点击Next,直接Finish即完成了项目的创建。

5) 创建包和配置文件,如图:
01

2. 编写web.xml

1) 打开web.xml,编写如下配置:

1
2
3
4
5
6
7
8
9
10
11
12
13
14
15
16
17
18
19
20
21
22
23
24
25
26
27
28
29
30
31
32
33
34
35
36
37
38
39
40
41
42
43
44
45
46
47
48
49
50
51
52
53
54
55
56
57
<?xml version="1.0" encoding="UTF-8"?>
<web-app xmlns="http://java.sun.com/xml/ns/javaee"
xmlns:xsi="http://www.w3.org/2001/XMLSchema-instance"
xsi:schemaLocation="http://java.sun.com/xml/ns/javaee
http://java.sun.com/xml/ns/javaee/web-app_3_0.xsd"

version="3.0">


<!-- Spring -->
<context-param>
<param-name>contextConfigLocation</param-name>
<param-value>classpath:spring-common.xml</param-value>
</context-param>

<listener>
<listener-class>org.springframework.web.context.ContextLoaderListener</listener-class>
</listener>

<!-- Spring MVC -->
<servlet>
<servlet-name>springMVC</servlet-name>
<servlet-class>org.springframework.web.servlet.DispatcherServlet</servlet-class>

<init-param>
<param-name>contextConfigLocation</param-name>
<param-value>classpath:spring-mvc.xml</param-value>
</init-param>

<load-on-startup>1</load-on-startup>
</servlet>

<servlet-mapping>
<servlet-name>springMVC</servlet-name>
<url-pattern>/</url-pattern>
</servlet-mapping>

<!-- 编码过滤器 -->
<filter>
<filter-name>encodingFilter</filter-name>
<filter-class>org.springframework.web.filter.CharacterEncodingFilter</filter-class>

<init-param>
<param-name>encoding</param-name>
<param-value>UTF-8</param-value>
</init-param>

<init-param>
<param-name>forceEncoding</param-name>
<param-value>true</param-value>
</init-param>
</filter>

<filter-mapping>
<filter-name>encodingFilter</filter-name>
<url-pattern>/*</url-pattern>
</filter-mapping>

</web-app>

2) 打开build.gradle文件, 在dependencies中,加入相关依赖:

1
compile 'org.springframework:spring-web:4.3.7.RELEASE'
compile 'org.springframework:spring-webmvc:4.3.7.RELEASE'

3. 编写相关配置文件

1) 打开db.properties文件,代码如下:

1
jdbc.url=jdbc:mysql://localhost:3306/dao_test?useUnicode=true&characterEncoding=utf8
jdbc.username=root
jdbc.password=123456

druid.initialSize=5
druid.minIdle=5
druid.maxActive=50

注意数据库名、用户名和密码都更改成你自己的。

2) 打开spring-mvc.xml,编写如下配置:

1
2
3
4
5
6
7
8
9
10
11
12
13
14
15
16
17
18
19
<?xml version="1.0" encoding="UTF-8"?>
<beans xmlns="http://www.springframework.org/schema/beans"
xmlns:xsi="http://www.w3.org/2001/XMLSchema-instance"
xmlns:context="http://www.springframework.org/schema/context"
xmlns:mvc="http://www.springframework.org/schema/mvc"
xsi:schemaLocation="http://www.springframework.org/schema/beans
http://www.springframework.org/schema/beans/spring-beans.xsd
http://www.springframework.org/schema/context
http://www.springframework.org/schema/context/spring-context.xsd
http://www.springframework.org/schema/mvc
http://www.springframework.org/schema/mvc/spring-mvc.xsd">


<context:component-scan base-package="com.fatesolo" use-default-filters="false">
<context:include-filter type="annotation" expression="org.springframework.stereotype.Controller"/>
</context:component-scan>

<mvc:annotation-driven/>

</beans>

3) 打开spring-common.xml,编写如下配置:

1
2
3
4
5
6
7
8
9
10
11
12
13
14
15
16
17
18
19
20
21
22
23
24
25
26
27
28
29
30
31
32
33
34
35
36
37
38
39
40
41
42
43
44
45
46
47
48
49
50
51
52
53
54
55
56
<?xml version="1.0" encoding="UTF-8"?>
<beans xmlns="http://www.springframework.org/schema/beans"
xmlns:xsi="http://www.w3.org/2001/XMLSchema-instance"
xmlns:context="http://www.springframework.org/schema/context"
xmlns:tx="http://www.springframework.org/schema/tx"
xsi:schemaLocation="http://www.springframework.org/schema/beans
http://www.springframework.org/schema/beans/spring-beans.xsd
http://www.springframework.org/schema/context
http://www.springframework.org/schema/context/spring-context.xsd
http://www.springframework.org/schema/tx
http://www.springframework.org/schema/tx/spring-tx.xsd">


<context:component-scan base-package="com.fatesolo">
<context:exclude-filter type="annotation" expression="org.springframework.stereotype.Controller"/>
</context:component-scan>

<!-- 引入 db.properties 配置文件 -->
<context:property-placeholder location="classpath:db.properties"/>

<!-- 数据源, 使用了Druid连接池 -->
<bean id="dataSource" class="com.alibaba.druid.pool.DruidDataSource" init-method="init" destroy-method="close">
<!-- 基本属性 url、user、password -->
<property name="url" value="${jdbc.url}"/>
<property name="username" value="${jdbc.username}"/>
<property name="password" value="${jdbc.password}"/>

<!-- 配置初始化大小、最小、最大 -->
<property name="initialSize" value="${druid.initialSize}"/>
<property name="minIdle" value="${druid.minIdle}"/>
<property name="maxActive" value="${druid.maxActive}"/>

<!-- 配置获取连接等待超时的时间 -->
<property name="maxWait" value="60000"/>

<!-- 配置间隔多久才进行一次检测,检测需要关闭的空闲连接,单位是毫秒 -->
<property name="timeBetweenEvictionRunsMillis" value="60000"/>

<!-- 配置一个连接在池中最小生存的时间,单位是毫秒 -->
<property name="minEvictableIdleTimeMillis" value="300000"/>

<property name="validationQuery" value="SELECT 'x'"/>
<property name="testWhileIdle" value="true"/>
<property name="testOnBorrow" value="false"/>
<property name="testOnReturn" value="false"/>

<property name="poolPreparedStatements" value="false"/>
</bean>

<!-- 配置事务 -->
<bean id="txManager" class="org.springframework.jdbc.datasource.DataSourceTransactionManager">
<property name="dataSource" ref="dataSource"/>
</bean>

<tx:annotation-driven transaction-manager="txManager"/>

</beans>

4) 打开build.gradle,加入如下依赖:

1
compile 'com.alibaba:druid:1.0.28'
compile 'mysql:mysql-connector-java:6.0.5'
compile 'org.springframework:spring-orm:4.3.7.RELEASE'

4. 编写基础代码

1) 这里以对书籍的增删改查为例,首先在MySQL数据库中创建数据库与表,并编写对应的实体类,这里只给出实体类Book的代码:

1
2
3
4
5
6
7
8
9
10
11
12
13
14
15
16
17
18
19
20
21
22
23
24
25
26
27
28
29
30
31
32
33
34
35
36
37
38
39
40
41
42
43
44
package com.fatesolo.entity;

public class Book {

private int id;

private String name;

private String author;

public int getId() {
return id;
}

public void setId(int id) {
this.id = id;
}

public String getName() {
return name;
}

public void setName(String name) {
this.name = name;
}

public String getAuthor() {
return author;
}

public void setAuthor(String author) {
this.author = author;
}

@Override
public String toString() {
return "Book{" +
"id=" + id +
", name='" + name + '\'' +
", author='" + author + '\'' +
'}';
}

}

2) 创建公共接口BookDao

1
2
3
4
5
6
7
8
9
10
11
12
13
14
15
16
17
18
19
20
21
22
23
24
package com.fatesolo.dao;

import com.fatesolo.entity.Book;

import java.util.List;

public interface BookDao {

/**
* 查找指定id的书籍
*/

Book findById(int id);

/**
* 查找包含该名字的所有书籍
*/

List<Book> findByNameContaining(String name);

/**
* 保存书籍
*/

void save(Book book);

}

3) 创建BookService

1
2
3
4
5
6
7
8
9
10
11
12
13
14
15
16
17
18
19
20
21
22
23
24
25
26
27
28
29
30
31
32
package com.fatesolo.service;

import com.fatesolo.dao.BookDao;
import com.fatesolo.entity.Book;
import org.springframework.stereotype.Service;
import org.springframework.transaction.annotation.Transactional;

import javax.annotation.Resource;
import java.util.List;

@Service
@Transactional(rollbackFor = Exception.class)
public class BookService {

@Resource
private BookDao bookDao;

public Book getBookById(int id) {
return bookDao.findById(id);
}

public List<Book> getBooksByName(String name) {
return bookDao.findByNameContaining(name);
}

public boolean addBook(Book book) {
bookDao.save(book);

return book.getId() != 0;
}

}

4) 创建BookController

1
2
3
4
5
6
7
8
9
10
11
12
13
14
15
16
17
18
19
20
21
22
23
24
25
26
27
28
29
30
31
32
33
34
35
36
37
38
39
package com.fatesolo.controller;

import com.fatesolo.entity.Book;
import com.fatesolo.service.BookService;
import org.springframework.web.bind.annotation.PathVariable;
import org.springframework.web.bind.annotation.RequestMapping;
import org.springframework.web.bind.annotation.RequestMethod;
import org.springframework.web.bind.annotation.RestController;

import javax.annotation.Resource;
import java.util.List;

@RestController
@RequestMapping(path = "/book", produces = "application/json;charset=UTF-8")
public class BookController {

@Resource
private BookService bookService;

@RequestMapping(path = "/{id}", method = RequestMethod.GET)
public String getBookById(@PathVariable int id) {
Book book = bookService.getBookById(id);

return book != null ? book.toString() : "Not Found";
}

@RequestMapping(path = "/name/{name}", method = RequestMethod.GET)
public String getBooksByName(@PathVariable String name) {
List<Book> books = bookService.getBooksByName(name);

return books.size() != 0 ? books.toString() : "Not Found";
}

@RequestMapping(path = "", method = RequestMethod.POST)
public String addBook(Book book) {
return bookService.addBook(book) ? book.toString() : "Failure";
}

}

至此,项目总体结构搭建完毕。


作者 [@FateSolo]
2017 年 03月 12日

近期经验总结


近期完成了一个小项目,代码量虽然较少,但是用到了一些之前没用过的东西,在此整合记录一下。

项目地址:https://github.com/FateSolo/SSM-Test

项目环境:

  • Ubuntu 14.04.3
  • Intellij IDEA 15.0.2
  • Gradle 2.5
  • JDK 1.6.0_38
  • Tomcat 7.0.67
  • Nginx 1.4.6

应用技术:

  • Spring 4.2.4
  • Spring MVC 4.2.4
  • Mybatis 3.3.0
  • Druid 1.0.9
  • Ehcache 2.6.9
  • Gson 2.5
  • Dom4j 1.6.1
  • Poi 3.9
  • Tomcat 7.0.47 (WebSocket)

1. 创建项目:

1) 打开IDEA,点击Create New Project,在左侧边栏找到Gradle,并勾选Java和Web,JDK选择1.6.0_38。

2) 点击Next后,GroupId可以填写为包名,这里我写为com.fatesolo;ArtifactId可以填写为项目名,这里我写为SSM-Test;Version不需要变动。

3) 点击Next后,勾选Use auto-import和Create directories for…,Gradle选择2.5,JDK选择1.6.0_38。

4) 点击Next后,直接Finish即完成了项目的创建。

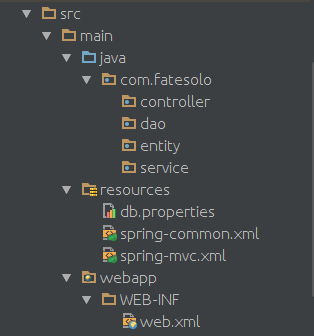
2. 基础配置

1) 点击File -> Project Structure,选择Modules,在SSM-Test下选择Web Gradle…,如图:
2

2) 点击Deployment Descriptors栏右侧的绿色加号,点击web.xml,在弹出的对话框中,在SSM-Test与WEB-INF路径之间添加src/main/webapp/,点击确定即完成了web.xml的创建。

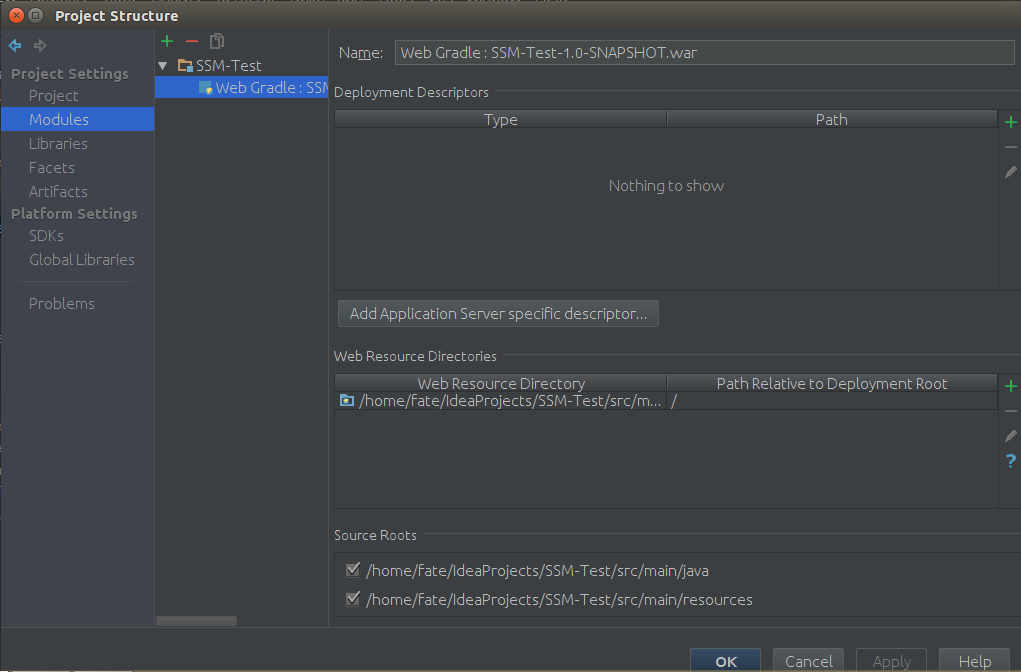
3) 在src/main/java中创建com.fatesolo,并创建controller, service, mapper, model, filter, socket, util七个子包。

4) 在src/main/resources中创建mapper文件夹,该文件夹主要存放实现数据访问层具体逻辑的xml文件,一般一个xml对应一个mapper子包中的接口。至此,基础配置完成,项目目录结构如图所示:
3

3. 编写web.xml

1) 打开web.xml,编写如下配置:

1
2
3
4
5
6
7
8
9
10
11
12
13
14
15
16
17
18
19
20
21
22
23
24
25
26
27
28
29
30
31
32
33
34
35
36
37
38
39
40
41
42
43
44
45
46
47
48
49
50
51
52
53
54
55
56
57
58
59
60
61
62
63
64
65
66
67
68
69
70
71
72
73
74
75
76
77
78
79
80
81
82
83
84
<?xml version="1.0" encoding="UTF-8"?>
<web-app xmlns="http://java.sun.com/xml/ns/javaee"
xmlns:xsi="http://www.w3.org/2001/XMLSchema-instance"
xsi:schemaLocation="http://java.sun.com/xml/ns/javaee
http://java.sun.com/xml/ns/javaee/web-app_3_0.xsd"

version="3.0">


<!-- Spring -->
<context-param>
<param-name>contextConfigLocation</param-name>
<param-value>classpath:spring-common.xml</param-value>
</context-param>

<listener>
<listener-class>org.springframework.web.context.ContextLoaderListener</listener-class>
</listener>

<!-- Spring MVC -->
<servlet>
<servlet-name>springMVC</servlet-name>
<servlet-class>org.springframework.web.servlet.DispatcherServlet</servlet-class>

<init-param>
<param-name>contextConfigLocation</param-name>
<param-value>classpath:spring-mvc.xml</param-value>
</init-param>

<load-on-startup>1</load-on-startup>
</servlet>

<servlet-mapping>
<servlet-name>springMVC</servlet-name>
<url-pattern>/</url-pattern>
</servlet-mapping>

<!-- Web Socket -->
<servlet>
<servlet-name>socket</servlet-name>
<servlet-class>com.fatesolo.socket.MyWebSocketServlet</servlet-class>
</servlet>

<servlet-mapping>
<servlet-name>socket</servlet-name>
<url-pattern>/socket</url-pattern>
</servlet-mapping>

<!-- Session 过期时间 -->
<session-config>
<session-timeout>120</session-timeout>
</session-config>

<!-- admin权限过滤器 -->
<filter>
<filter-name>sessionFilter</filter-name>
<filter-class>com.fatesolo.filter.SessionFilter</filter-class>
</filter>

<filter-mapping>
<filter-name>sessionFilter</filter-name>
<url-pattern>/*</url-pattern>
</filter-mapping>

<!-- 编码过滤器 -->
<filter>
<filter-name>encodingFilter</filter-name>
<filter-class>org.springframework.web.filter.CharacterEncodingFilter</filter-class>

<init-param>
<param-name>encoding</param-name>
<param-value>UTF-8</param-value>
</init-param>

<init-param>
<param-name>forceEncoding</param-name>
<param-value>true</param-value>
</init-param>
</filter>

<filter-mapping>
<filter-name>encodingFilter</filter-name>
<url-pattern>/*</url-pattern>
</filter-mapping>

</web-app>

2) 导入第三方库,在build.gradle的dependencies中,加入如下两句话:

1
compile 'org.springframework:spring-web:4.2.4.RELEASE'
compile 'org.springframework:spring-webmvc:4.2.4.RELEASE'

3) 在socket包中创建MyWebSocketServlet类,在filter包中创建SessionFilter类,在resources文件夹内新建spring-common.xml和spring-mvc.xml。

4. 编写相关配置文件

1) 创建并编写jdbc.properties文件,代码如下:

1
jdbc.url=jdbc:mysql://localhost:3306/TestDB?useUnicode=true&characterEncoding=utf8&mysqlEncoding=utf8
jdbc.username=root
jdbc.password=123456

druid.initialSize=5
druid.minIdle=5
druid.maxActive=50

注意数据库名、用户名和密码都更改成你自己的,下面的Druid配置可以根据需要自行修改。

2) 创建并编写log4j.properties文件,代码如下:

1
log4j.rootLogger=INFO, CONSOLE, FILE

log4j.appender.CONSOLE=org.apache.log4j.ConsoleAppender
log4j.appender.CONSOLE.layout=org.apache.log4j.PatternLayout
log4j.appender.CONSOLE.layout.ConversionPattern=[%-5p] %d{yyyy-MM-dd HH:mm:ss,SSS} method:%l%n%m%n

log4j.appender.FILE=org.apache.log4j.RollingFileAppender
log4j.appender.FILE.File=../logs/log4j.log
log4j.appender.FILE.MaxFileSize=1MB
log4j.appender.FILE.Append=true
log4j.appender.FILE.layout=org.apache.log4j.PatternLayout
log4j.appender.FILE.layout.ConversionPattern=[%-5p] %d{yyyy-MM-dd HH:mm:ss,SSS} method:%l%n%m%n

3) 创建并编写ehcache.xml文件,代码如下:

1
2
3
4
5
6
7
8
9
10
11
12
13
14
15
16
17
18
19
20
21
22
23
24
25
26
27
<?xml version="1.0" encoding="UTF-8"?>
<ehcache xmlns:xsi="http://www.w3.org/2001/XMLSchema-instance"
xsi:noNamespaceSchemaLocation="http://ehcache.org/ehcache.xsd">


<diskStore path="java.io.tmpdir"/>

<defaultCache maxElementsInMemory="100"
eternal="false"
timeToIdleSeconds="30"
timeToLiveSeconds="30"
overflowToDisk="false"/>


<!-- 获取最新的十条数据, 永不过期, 当有数据更新时手动清除缓存 -->
<cache name="listCache"
maxElementsInMemory="10"
eternal="true"
overflowToDisk="false"/>


<!-- 定期取得最新的腾讯视频地址, 四小时自动清除缓存 -->
<cache name="urlCache"
maxElementsInMemory="10"
eternal="false"
timeToIdleSeconds="0"
timeToLiveSeconds="14400"
overflowToDisk="false"/>


</ehcache>

4) 打开spring-mvc.xml,编写如下配置:

1
2
3
4
5
6
7
8
9
10
11
12
13
14
15
16
17
<?xml version="1.0" encoding="UTF-8"?>
<beans xmlns="http://www.springframework.org/schema/beans"
xmlns:xsi="http://www.w3.org/2001/XMLSchema-instance"
xmlns:context="http://www.springframework.org/schema/context"
xmlns:mvc="http://www.springframework.org/schema/mvc"
xsi:schemaLocation="http://www.springframework.org/schema/beans
http://www.springframework.org/schema/beans/spring-beans.xsd
http://www.springframework.org/schema/context
http://www.springframework.org/schema/context/spring-context.xsd
http://www.springframework.org/schema/mvc
http://www.springframework.org/schema/mvc/spring-mvc.xsd">


<context:component-scan base-package="com.fatesolo.controller"/>

<mvc:annotation-driven/>

</beans>

5) 打开spring-common.xml,编写如下配置:

1
2
3
4
5
6
7
8
9
10
11
12
13
14
15
16
17
18
19
20
21
22
23
24
25
26
27
28
29
30
31
32
33
34
35
36
37
38
39
40
41
42
43
44
45
46
47
48
49
50
51
52
53
54
55
56
57
58
59
60
61
62
63
64
65
66
67
68
69
70
71
72
73
74
75
76
77
78
79
80
<?xml version="1.0" encoding="UTF-8"?>
<beans xmlns="http://www.springframework.org/schema/beans"
xmlns:xsi="http://www.w3.org/2001/XMLSchema-instance"
xmlns:context="http://www.springframework.org/schema/context"
xmlns:tx="http://www.springframework.org/schema/tx"
xmlns:cache="http://www.springframework.org/schema/cache"
xsi:schemaLocation="http://www.springframework.org/schema/beans
http://www.springframework.org/schema/beans/spring-beans.xsd
http://www.springframework.org/schema/context
http://www.springframework.org/schema/context/spring-context.xsd
http://www.springframework.org/schema/tx
http://www.springframework.org/schema/tx/spring-tx.xsd
http://www.springframework.org/schema/cache
http://www.springframework.org/schema/cache/spring-cache.xsd">


<context:component-scan base-package="com.fatesolo.service"/>

<!-- 引入 jdbc.properties 配置文件 -->
<context:property-placeholder location="classpath:jdbc.properties"/>

<!-- 数据源, 使用了Druid连接池 -->
<bean id="dataSource" class="com.alibaba.druid.pool.DruidDataSource" init-method="init" destroy-method="close">
<!-- 基本属性 url、user、password -->
<property name="url" value="${jdbc.url}"/>
<property name="username" value="${jdbc.username}"/>
<property name="password" value="${jdbc.password}"/>

<!-- 配置初始化大小、最小、最大 -->
<property name="initialSize" value="${druid.initialSize}"/>
<property name="minIdle" value="${druid.minIdle}"/>
<property name="maxActive" value="${druid.maxActive}"/>

<!-- 配置获取连接等待超时的时间 -->
<property name="maxWait" value="60000"/>

<!-- 配置间隔多久才进行一次检测,检测需要关闭的空闲连接,单位是毫秒 -->
<property name="timeBetweenEvictionRunsMillis" value="60000"/>

<!-- 配置一个连接在池中最小生存的时间,单位是毫秒 -->
<property name="minEvictableIdleTimeMillis" value="300000"/>

<property name="validationQuery" value="SELECT 'x'"/>
<property name="testWhileIdle" value="true"/>
<property name="testOnBorrow" value="false"/>
<property name="testOnReturn" value="false"/>

<property name="poolPreparedStatements" value="false"/>
</bean>

<!-- Mybatis -->
<bean id="sqlSessionFactory" class="org.mybatis.spring.SqlSessionFactoryBean">
<property name="dataSource" ref="dataSource"/>
<property name="typeAliasesPackage" value="com.fatesolo.model"/>
<property name="mapperLocations" value="classpath:mapper/*Mapper.xml"/>
</bean>

<bean class="org.mybatis.spring.mapper.MapperScannerConfigurer">
<property name="basePackage" value="com.fatesolo.mapper"/>
<property name="sqlSessionFactoryBeanName" value="sqlSessionFactory"/>
</bean>

<!-- 配置事务 -->
<bean id="txManager" class="org.springframework.jdbc.datasource.DataSourceTransactionManager">
<property name="dataSource" ref="dataSource"/>
</bean>

<tx:annotation-driven transaction-manager="txManager"/>

<!-- Ehcache -->
<bean id="cacheManagerFactory" class="org.springframework.cache.ehcache.EhCacheManagerFactoryBean">
<property name="configLocation" value="classpath:ehcache.xml"/>
</bean>

<bean id="cacheManager" class="org.springframework.cache.ehcache.EhCacheCacheManager">
<property name="cacheManager" ref="cacheManagerFactory"/>
</bean>

<cache:annotation-driven cache-manager="cacheManager"/>

</beans>

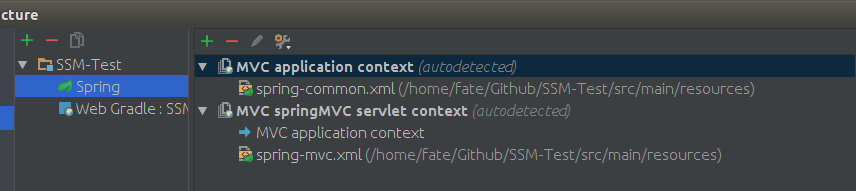
6) 此时发现IDEA给出了如下图提示:
4
点击Create Spring facet,创建成如下图样式并确定。
5

7) 发现缺少相关class,再打开build.gradle,加入如下依赖:

1
compile 'com.alibaba:druid:1.0.9'

compile 'net.sf.ehcache:ehcache-core:2.6.9'

compile 'org.mybatis:mybatis:3.3.0'
compile 'org.mybatis:mybatis-spring:1.2.3'

compile 'org.springframework:spring-context-support:4.2.4.RELEASE'
compile 'org.springframework:spring-jdbc:4.2.4.RELEASE'

至此,Spring、SpringMVC、Mybatis、Druid、Ehcache已经配置并整合完毕。

5. 实现具体功能

实现这样一个功能:用户打开网页后可以观看腾讯视频,可以看到最新的十条留言,可以自行留言,当其他人留言时可以实时更新;admin可以登录到后台数据管理系统,可以查看所有留言,可以下载为Excel格式。

1) 首先在MySQL数据库中创建数据库与表,并编写对应的实体类,这里只给出实体类的代码:

1
2
3
4
5
6
7
8
9
10
11
12
13
14
15
16
17
18
19
20
21
22
23
24
25
26
27
28
29
30
31
32
33
34
35
36
37
38
39
40
41
42
43
44
45
package com.fatesolo.model;

public class Message {

private long id;

private String name;

private String message;

private String createTime;

public long getId() {
return id;
}

public void setId(long id) {
this.id = id;
}

public String getName() {
return name;
}

public void setName(String name) {
this.name = name;
}

public String getMessage() {
return message;
}

public void setMessage(String message) {
this.message = message;
}

public String getCreateTime() {
return createTime;
}

public void setCreateTime(String createTime) {
this.createTime = createTime;
}

}

1
2
3
4
5
6
7
8
9
10
11
12
13
14
15
16
17
18
19
20
21
22
23
24
25
26
27
28
29
30
31
32
33
34
35
package com.fatesolo.model;

public class User {

private int id;

private String username;

private String password;

public int getId() {
return id;
}

public void setId(int id) {
this.id = id;
}

public String getUsername() {
return username;
}

public void setUsername(String username) {
this.username = username;
}

public String getPassword() {
return password;
}

public void setPassword(String password) {
this.password = password;
}

}

2) 创建数据访问接口

1
2
3
4
5
6
7
8
9
10
11
12
13
14
15
16
17
18
19
20
package com.fatesolo.mapper;

import com.fatesolo.model.Message;
import org.apache.ibatis.annotations.Param;

import java.util.List;

public interface MessageMapper {

void add(Message message);

int getCount();

/*
* @param m : 从第m+1条数据开始获取
* @param n : 获取n条数据
*/

List<Message> getList(@Param(value="m") int m, @Param(value="n") int n);

}

1
2
3
4
5
6
7
8
9
package com.fatesolo.mapper;

import com.fatesolo.model.User;

public interface UserMapper {

User getUser(String username);

}

3) 在src/main/resources/mapper中创建对应的xml文件

1
2
3
4
5
6
7
8
9
10
11
12
13
14
15
16
17
18
19
20
<?xml version="1.0" encoding="UTF-8"?>
<!DOCTYPE mapper PUBLIC "-//mybatis.org//DTD Mapper 3.0//EN" "http://mybatis.org/dtd/mybatis-3-mapper.dtd">

<mapper namespace="com.fatesolo.mapper.MessageMapper">

<insert id="add" parameterType="Message" useGeneratedKeys="true" keyProperty="id">
insert into Message(name, message, createTime) values(#{name}, #{message}, #{createTime})
</insert>

<select id="getCount" resultType="int">
select count(1) from Message
</select>

<select id="getList" resultType="Message">
select id, name, message,
FROM_UNIXTIME(createTime/1000, '%Y-%m-%d %H:%i:%s') createTime from Message
order by createTime desc limit #{m}, #{n}
</select>

</mapper>

1
2
3
4
5
6
7
8
9
10
<?xml version="1.0" encoding="UTF-8"?>
<!DOCTYPE mapper PUBLIC "-//mybatis.org//DTD Mapper 3.0//EN" "http://mybatis.org/dtd/mybatis-3-mapper.dtd">

<mapper namespace="com.fatesolo.mapper.UserMapper">

<select id="getUser" parameterType="java.lang.String" resultType="User">
select * from User where username = #{username}
</select>

</mapper>

4) 编写工具类

1
2
3
4
5
6
7
8
9
10
11
12
13
14
15
16
17
18
19
20
21
22
23
24
25
26
27
28
29
30
31
32
package com.fatesolo.util;

import java.text.SimpleDateFormat;
import java.util.Calendar;
import java.util.TimeZone;

public class DateTimeUtil {

//获取当前毫秒时间
public static String getCurrentTimeMillis() {
TimeZone.setDefault(TimeZone.getTimeZone("GMT+8"));

return String.valueOf(System.currentTimeMillis());
}

//毫秒时间转换为日期时间格式
public static String millisToDateTime(String millis) {
Calendar calendar = Calendar.getInstance();
calendar.setTimeInMillis(Long.parseLong(millis));

return new SimpleDateFormat("yyyy-MM-dd HH:mm:ss").format(calendar.getTime());
}

//毫秒时间转换为日期格式
public static String millisToDate(String millis) {
Calendar calendar = Calendar.getInstance();
calendar.setTimeInMillis(Long.parseLong(millis));

return new SimpleDateFormat("yyyy-MM-dd").format(calendar.getTime());
}

}

1
2
3
4
5
6
7
8
9
10
11
12
13
14
15
16
17
18
19
20
21
22
23
24
25
26
27
28
29
30
31
32
33
34
35
36
37
38
39
40
41
42
43
44
45
46
47
48
49
50
51
52
53
54
55
56
57
58
59
60
61
62
63
64
65
66
67
68
69
70
71
72
73
74
75
76
77
78
79
80
81
82
83
84
85
86
87
88
89
90
91
92
93
package com.fatesolo.util;

import com.fatesolo.model.Message;
import org.apache.poi.hssf.usermodel.HSSFWorkbook;
import org.apache.poi.ss.usermodel.Cell;
import org.apache.poi.ss.usermodel.CellStyle;
import org.apache.poi.ss.usermodel.Font;
import org.apache.poi.ss.usermodel.IndexedColors;
import org.apache.poi.ss.usermodel.Row;
import org.apache.poi.ss.usermodel.Sheet;
import org.apache.poi.ss.usermodel.Workbook;

import java.util.ArrayList;
import java.util.HashMap;
import java.util.List;
import java.util.Map;

//使用poi创建Excel工具类
public class ExcelUtil {

public static Workbook createWorkBook(List<Map<String, Object>> list, short[] width, String[] keys, String columnNames[]) {
Workbook wb = new HSSFWorkbook();
Sheet sheet = wb.createSheet(list.get(0).get("sheetName").toString());

for (int i = 0; i < keys.length; i++) {
sheet.setColumnWidth((short) i, width[i] * 150);
}

Row row = sheet.createRow((short) 0);

CellStyle cs = wb.createCellStyle();
CellStyle cs2 = wb.createCellStyle();

Font f = wb.createFont();
Font f2 = wb.createFont();

f.setFontHeightInPoints((short) 10);
f.setColor(IndexedColors.BLACK.getIndex());
f.setBoldweight(Font.BOLDWEIGHT_BOLD);

f2.setFontHeightInPoints((short) 10);
f2.setColor(IndexedColors.BLACK.getIndex());

cs.setFont(f);
cs.setBorderLeft(CellStyle.BORDER_THIN);
cs.setBorderRight(CellStyle.BORDER_THIN);
cs.setBorderTop(CellStyle.BORDER_THIN);
cs.setBorderBottom(CellStyle.BORDER_THIN);
cs.setAlignment(CellStyle.ALIGN_CENTER);

cs2.setFont(f2);
cs2.setBorderLeft(CellStyle.BORDER_THIN);
cs2.setBorderRight(CellStyle.BORDER_THIN);
cs2.setBorderTop(CellStyle.BORDER_THIN);
cs2.setBorderBottom(CellStyle.BORDER_THIN);
cs2.setAlignment(CellStyle.ALIGN_CENTER);

for (int i = 0; i < columnNames.length; i++) {
Cell cell = row.createCell(i);
cell.setCellValue(columnNames[i]);
cell.setCellStyle(cs);
}

for (short i = 1; i < list.size(); i++) {
Row row1 = sheet.createRow(i);
for (short j = 0; j < keys.length; j++) {
Cell cell = row1.createCell(j);
cell.setCellValue(list.get(i).get(keys[j]) == null ? " " : list.get(i).get(keys[j]).toString());
cell.setCellStyle(cs2);
}
}

return wb;
}

public static List<Map<String, Object>> createExcelRecord(List<Message> messages) {
List<Map<String, Object>> list = new ArrayList<Map<String, Object>>();
Map<String, Object> map = new HashMap<String, Object>();
map.put("sheetName", "sheet1");
list.add(map);

for (Message message : messages) {
Map<String, Object> mapValue = new HashMap<String, Object>();
mapValue.put("id", message.getId());
mapValue.put("name", message.getName());
mapValue.put("message", message.getMessage());
mapValue.put("createTime", message.getCreateTime());
list.add(mapValue);
}
return list;
}

}
1
2
3
4
5
6
7
8
9
10
11
12
13
14
15
16
17
18
19
20
21
22
23
24
25
26
27
28
29
30
31
32
33
34
35
36
37
38
39
40
41
42
43
44
package com.fatesolo.util;

import org.dom4j.Document;
import org.dom4j.DocumentHelper;

import java.io.BufferedReader;
import java.io.InputStreamReader;
import java.net.URL;
import java.net.URLConnection;

public class HttpUtil {

//发起Http Get请求
public static String httpRequest(String url) throws Exception {
StringBuilder response = new StringBuilder();
String line;

URL realUrl = new URL(url);
URLConnection connection = realUrl.openConnection();
connection.connect();
BufferedReader in = new BufferedReader(new InputStreamReader(connection.getInputStream()));

while ((line = in.readLine()) != null) {
response.append(line);
}
in.close();

return response.toString();
}

//获取包含腾讯视频真实地址的xml, 使用Dom4j解析出真实url, vid可自行更换
public static String getVideoUrl() {
String response = "";
try {
response = HttpUtil.httpRequest("http://vv.video.qq.com/geturl?vid=f0019r1sytg");
Document document = DocumentHelper.parseText(response);
response = document.getRootElement().element("vd").element("vi").element("url").getText();
} catch (Exception e) {
e.printStackTrace();
}
return response;
}

}
1
2
3
4
5
6
7
8
9
10
11
12
13
14
15
16
17
18
19
20
21
22
23
24
25
26
27
28
29
30
31
32
33
34
35
36
37
38
39
40
41
42
43
44
45
46
47
48
package com.fatesolo.util;

import java.security.MessageDigest;

//MD5加密工具类
public class MD5Util {

public static byte[] encode2bytes(String source) {
byte[] result = null;

try {
MessageDigest md = MessageDigest.getInstance("MD5");
md.reset();
md.update(source.getBytes("UTF-8"));
result = md.digest();
} catch (Exception e) {
e.printStackTrace();
}

return result;
}

public static String encode2hex(String source) {
byte[] data = encode2bytes(source);

StringBuilder hexString = new StringBuilder();
for (byte aData : data) {
String hex = Integer.toHexString(0xff & aData);

if (hex.length() == 1) {
hexString.append('0');
}

hexString.append(hex);
}

return hexString.toString();
}

/*
* @param unknown : 明文字符串
* @param okHex : 加密后的32位字符串
*/

public static boolean validate(String unknown, String okHex) {
return okHex.equals(encode2hex(unknown));
}

}
1
2
3
4
5
6
7
8
9
10
11
12
13
14
15
16
17
18
19
20
21
22
23
24
25
26
27
28
29
30
31
32
33
34
35
36
37
38
39
40
41
42
43
44
45
46
47
48
49
50
51
52
53
54
55
56
57
58
59
60
61
62
63
64
65
66
67
68
69
70
71
72
73
74
package com.fatesolo.util;

import java.util.List;

//分页工具类
public class QuickPager<T> {

private int currPage = 1;

private int pageSize = 10;

private int totalRows = 0;

private int totalPages = 0;

private List<T> list = null;

public QuickPager(int currPage, int pageSize) {
this.currPage = currPage;
this.pageSize = pageSize;
}

public QuickPager(String currPage, String pageSize) {
if (currPage != null && !currPage.equals("")) {
this.currPage = Integer.parseInt(currPage);
}

if (pageSize != null && !pageSize.equals("")) {
this.pageSize = Integer.parseInt(pageSize);
}
}

public int getCurrPage() {
return currPage;
}

public void setCurrPage(int currPage) {
this.currPage = currPage;
}

public int getPageSize() {
return pageSize;
}

public void setPageSize(int pageSize) {
this.pageSize = pageSize;
}

public int getTotalRows() {
return totalRows;
}

public void setTotalRows(int totalRows) {
this.totalRows = totalRows;
this.setTotalPages(this.totalRows == 0 ? 0 : (this.totalRows % this.pageSize != 0 ? this.totalRows / this.pageSize + 1 : this.totalRows / this.pageSize));
}

public int getTotalPages() {
return totalPages;
}

private void setTotalPages(int totalPages) {
this.totalPages = totalPages;
}

public List<T> getList() {
return list;
}

public void setList(List<T> list) {
this.list = list;
}

}
1
2
3
4
5
6
7
8
9
10
11
12
13
14
15
16
17
18
19
20
21
22
23
24
25
26
27
28
29
30
31
32
33
34
35
36
37
38
package com.fatesolo.util;

import com.google.gson.Gson;
import com.google.gson.GsonBuilder;

import java.util.HashMap;
import java.util.Map;

public class Response {

//使用Nginx进行反向代理, 并管理html, js, css等静态资源文件, 该路径对应了Nginx配置中对应静态资源的location
public final static String PATH = "/message/";

public final static String SUCCESS = "000000";

public final static String FAILURE = "100001";

public static String success(String msg) {
return "{\"resCode\":\"" + SUCCESS + "\",\"resMsg\":\"" + msg + "\",\"data\":{}}";
}

public static String failure(String msg) {
return "{\"resCode\":\"" + FAILURE + "\",\"resMsg\":\"" + msg + "\",\"data\":{}}";
}

//使用Gson将对象转换为JSON字符串
public static String toJson(Object obj) {
Map<String, Object> body = new HashMap<String, Object>();

body.put("resCode", SUCCESS);
body.put("resMsg", "成功");
body.put("data", obj);

Gson gson = new GsonBuilder().disableHtmlEscaping().create();
return gson.toJson(body);
}

}

对于Response.PATH,在Nginx中对应的配置如下:

1
server {
    listen       80;
    server_name  localhost;

    location ^~ /message/ {
        root   /etc/nginx/html/static;
        index  index.html index.htm;
        access_log off;
        expires 5d;
    }

    location /messageweb/ {
        proxy_pass  http://127.0.0.1:8080;
        proxy_redirect  off;
        proxy_set_header Host $host;
        proxy_set_header  X-Real-IP  $remote_addr;
        proxy_set_header  X-Forwarded-For $proxy_add_x_forwarded_for;
    }
}

第一个location对应静态资源,路径应与Response.PATH一致,root可自行修改,第二个location是转发配置,路径应与项目在tomcat中的名称一致。

引入相关依赖:

1
compile 'com.google.code.gson:gson:2.5'

compile 'dom4j:dom4j:1.6.1'

compile 'org.apache.poi:poi:3.9'

5) 创建Service

1
2
3
4
5
6
7
8
9
10
11
12
13
14
15
16
17
18
19
20
21
22
23
24
25
26
27
28
29
30
31
32
33
34
35
36
37
38
39
40
41
42
43
44
45
46
47
48
49
50
51
52
53
54
55
56
57
58
59
60
61
62
63
64
65
66
67
68
package com.fatesolo.service;

import com.fatesolo.mapper.MessageMapper;
import com.fatesolo.model.Message;
import com.fatesolo.util.DateTimeUtil;
import com.fatesolo.util.HttpUtil;
import com.fatesolo.util.QuickPager;
import org.springframework.cache.annotation.CacheEvict;
import org.springframework.cache.annotation.Cacheable;
import org.springframework.stereotype.Service;
import org.springframework.transaction.annotation.Transactional;

import javax.annotation.Resource;
import java.util.List;

@Service
@Transactional(rollbackFor = Exception.class)
public class MessageService {

@Resource
private MessageMapper mapper;

public boolean add(Message message) {
message.setCreateTime(DateTimeUtil.getCurrentTimeMillis());
mapper.add(message);

message.setCreateTime(DateTimeUtil.millisToDateTime(message.getCreateTime()));
return message.getId() != 0;
}

//获取最新十条数据
@Cacheable(value = "listCache")
public List<Message> getList() {
return mapper.getList(0, 10);
}

//手动清除缓存
@CacheEvict(value = "listCache", allEntries = true)
public void removeList() {
}

//获取腾讯视频真实url
@Cacheable(value = "urlCache")
public String getUrl() {
return HttpUtil.getVideoUrl();
}

//为防止url失效, 留出手动清除缓存接口
@CacheEvict(value = "urlCache", allEntries = true)
public void removeUrl() {
}

//获取分页数据
public QuickPager<Message> getQuickPager(String currPage, String pageSize) {
QuickPager<Message> pager = new QuickPager<Message>(currPage, pageSize);

pager.setTotalRows(mapper.getCount());
pager.setList(mapper.getList((pager.getCurrPage() - 1) * pager.getPageSize(), pager.getPageSize()));

return pager;
}

//获取所有数据
public List<Message> getAll() {
return mapper.getList(0, mapper.getCount());
}

}

1
2
3
4
5
6
7
8
9
10
11
12
13
14
15
16
17
18
19
20
21
22
23
24
package com.fatesolo.service;

import com.fatesolo.mapper.UserMapper;
import com.fatesolo.model.User;
import com.fatesolo.util.MD5Util;
import org.springframework.stereotype.Service;
import org.springframework.transaction.annotation.Transactional;

import javax.annotation.Resource;

@Service
@Transactional(rollbackFor = Exception.class)
public class LoginService {

@Resource
private UserMapper mapper;

public boolean login(String username, String password) {
User user = mapper.getUser(username);

return user != null && MD5Util.validate(password, user.getPassword());
}

}

6) 编写Web Socket

1
2
3
4
5
6
7
8
9
10
11
12
13
14
15
package com.fatesolo.socket;

import org.apache.catalina.websocket.StreamInbound;
import org.apache.catalina.websocket.WebSocketServlet;

import javax.servlet.http.HttpServletRequest;

public class MyWebSocketServlet extends WebSocketServlet {

@Override
protected StreamInbound createWebSocketInbound(String subProtocol, HttpServletRequest request) {
return new MyMessageInbound();
}

}

1
2
3
4
5
6
7
8
9
10
11
12
13
14
15
16
17
18
19
20
21
22
23
24
25
26
27
28
29
30
31
32
33
34
package com.fatesolo.socket;

import org.apache.catalina.websocket.MessageInbound;
import org.apache.catalina.websocket.WsOutbound;

import java.io.IOException;
import java.nio.ByteBuffer;
import java.nio.CharBuffer;

public class MyMessageInbound extends MessageInbound {

//断开连接
@Override
protected void onClose(int status) {
WebSocketManager.remove(this);
super.onClose(status);
}

//建立连接
@Override
protected void onOpen(WsOutbound outbound) {
super.onOpen(outbound);
WebSocketManager.add(this);
}

@Override
protected void onBinaryMessage(ByteBuffer message) throws IOException {
}

@Override
protected void onTextMessage(CharBuffer message) throws IOException {
}

}
1
2
3
4
5
6
7
8
9
10
11
12
13
14
15
16
17
18
19
20
21
22
23
24
25
26
27
28
29
30
31
32
33
34
35
36
37
38
39
40
package com.fatesolo.socket;

import org.apache.catalina.websocket.MessageInbound;
import org.apache.catalina.websocket.WsOutbound;

import java.nio.CharBuffer;
import java.util.concurrent.CopyOnWriteArrayList;

public class WebSocketManager {

//线程安全的ArrayList
private static CopyOnWriteArrayList<MessageInbound> clients = new CopyOnWriteArrayList<MessageInbound>();

public static void add(MessageInbound client) {
clients.add(client);
}

public static void remove(MessageInbound client) {
clients.remove(client);
}

public static int getSize() {
return clients.size();
}

public static void sendMessage(String message) {
for (MessageInbound client : clients) {
try {
CharBuffer buffer = CharBuffer.wrap(message);
WsOutbound outbound = client.getWsOutbound();

outbound.writeTextMessage(buffer);
outbound.flush();
} catch (Exception e) {
remove(client);
}
}
}

}

引入相关依赖:

1
compile 'org.apache.tomcat:tomcat-catalina:7.0.47'
compile 'org.apache.tomcat:tomcat-coyote:7.0.47'

这是Tomcat的实现,现在已经不推荐使用。但因为项目需要,使用了JDK 1.6,而推荐的JSR-356标准的WebSocekt至少需要JDK 1.7。当你使用了JDK 1.7及以上时,可以使用Spring提供的WebSocket,那是基于JSR-356标准的实现。

另外,因为使用了Nginx进行反向代理,所以需要在相应配置文件中加入如下配置,令Nginx支持对socket的转发:

1
location /messageweb/socket {
    proxy_pass http://127.0.0.1:8080;
    proxy_http_version 1.1;
    proxy_set_header Upgrade $http_upgrade;
    proxy_set_header Connection "upgrade";
    proxy_read_timeout 86400;
}

7) 创建Controller

1
2
3
4
5
6
7
8
9
10
11
12
13
14
15
16
17
18
19
20
21
22
23
24
25
26
27
28
29
30
31
32
33
34
35
36
37
38
39
40
41
42
43
44
package com.fatesolo.controller;

import com.fatesolo.model.Message;
import com.fatesolo.service.MessageService;
import com.fatesolo.socket.WebSocketManager;
import com.fatesolo.util.Response;
import org.springframework.web.bind.annotation.*;

import javax.annotation.Resource;
import java.util.HashMap;
import java.util.Map;

@RestController
@RequestMapping(value = "/message", produces = "application/json;charset=UTF-8")
public class MessageController {

@Resource
private MessageService service;

//当有数据更新时, 清空缓存, 并向所有建立socket连接的用户发送实时数据
@RequestMapping(value = "", method = RequestMethod.POST)
public String add(Message message) {
if (service.add(message)) {
service.removeList();
WebSocketManager.sendMessage(Response.toJson(message));

return Response.success("AddSuccess");
} else {
return Response.failure("AddFailure");
}
}

//取得前十条数据和腾讯视频真实地址
@RequestMapping(value = "", method = RequestMethod.GET)
public String getList() {
Map<String, Object> map = new HashMap<String, Object>();

map.put("list", service.getList());
map.put("url", service.getUrl());

return Response.toJson(map);
}

}

1
2
3
4
5
6
7
8
9
10
11
12
13
14
15
16
17
18
19
20
21
22
23
24
25
26
27
28
29
30
31
32
33
34
35
36
37
38
39
40
41
42
43
44
45
46
47
48
49
50
51
52
53
54
55
56
57
58
59
60
61
62
63
64
65
66
67
68
69
70
71
72
73
74
75
76
77
78
79
80
81
82
83
84
85
86
87
88
89
90
91
92
93
94
95
96
97
98
99
100
101
102
103
104
105
106
107
108
109
package com.fatesolo.controller;

import com.fatesolo.model.User;
import com.fatesolo.service.LoginService;
import com.fatesolo.service.MessageService;
import com.fatesolo.socket.WebSocketManager;
import com.fatesolo.util.DateTimeUtil;
import com.fatesolo.util.ExcelUtil;
import com.fatesolo.util.Response;
import org.springframework.stereotype.Controller;
import org.springframework.web.bind.annotation.*;

import javax.annotation.Resource;
import javax.servlet.ServletOutputStream;
import javax.servlet.http.HttpServletRequest;
import javax.servlet.http.HttpServletResponse;
import javax.servlet.http.HttpSession;
import java.io.*;
import java.util.List;
import java.util.Map;

@Controller
@RequestMapping(value = "/admin", produces = "application/json;charset=UTF-8")
public class AdminController {

@Resource
private LoginService service;

@Resource
private MessageService service2;

@RequestMapping(value = "/login", method = RequestMethod.POST)
public void login(HttpServletRequest request,
HttpServletResponse response,
User user) throws IOException
{

if (service.login(user.getUsername(), user.getPassword())) {
HttpSession session = request.getSession();
session.setAttribute("user", user);

response.sendRedirect(Response.PATH + "dashboard.html");
} else {
response.sendRedirect(Response.PATH + "login.html?error=1");
}
}

@RequestMapping(value = "/message", method = RequestMethod.GET)
@ResponseBody
public String getList(@RequestParam(value = "currPage", required = false) String currPage,
@RequestParam(value = "pageSize", required = false) String pageSize) {

return Response.toJson(service2.getQuickPager(currPage, pageSize));
}

@RequestMapping(value = "/download", method = RequestMethod.GET)
public void download(HttpServletResponse response) throws IOException {
String fileName = "留言列表 " + DateTimeUtil.millisToDate(DateTimeUtil.getCurrentTimeMillis());

short[] width = {7, 20, 100, 35};
String[] columnNames = {"ID", "姓名", "留言", "时间"};
String[] keys = {"id", "name", "message" ,"createTime"};
List<Map<String, Object>> list = ExcelUtil.createExcelRecord(service2.getAll());

ByteArrayOutputStream os = new ByteArrayOutputStream();
ExcelUtil.createWorkBook(list, width, keys, columnNames).write(os);

byte[] content = os.toByteArray();
InputStream is = new ByteArrayInputStream(content);

response.reset();
response.setContentType("application/vnd.ms-excel;charset=utf-8");
response.setHeader("Content-Disposition", "attachment;filename=" + new String((fileName + ".xls").getBytes(), "iso-8859-1"));

ServletOutputStream out = response.getOutputStream();
BufferedInputStream bis = new BufferedInputStream(is);
BufferedOutputStream bos = new BufferedOutputStream(out);

byte[] buff = new byte[2048];
int bytesRead;

while (-1 != (bytesRead = bis.read(buff, 0, buff.length))) {
bos.write(buff, 0, bytesRead);
}

bis.close();
bos.close();
}

//为防止腾讯视频url失效而设的手动清除缓存接口
@RequestMapping(value = "/remove", method = RequestMethod.GET)
@ResponseBody
public String removeUrl() {
service2.removeUrl();
return Response.success("RemoveUrlCacheSuccess");
}

//查看当前建立socket连接的用户数量
@RequestMapping(value = "/size", method = RequestMethod.GET)
@ResponseBody
public String getSize() {
return Response.success(String.valueOf(WebSocketManager.getSize()));
}

@RequestMapping(value = "/logout", method = RequestMethod.GET)
public void logout(HttpServletRequest request,
HttpServletResponse response) throws IOException
{

request.getSession().invalidate();
response.sendRedirect(Response.PATH + "login.html");
}

}

8) 编写admin权限过滤器

1
2
3
4
5
6
7
8
9
10
11
12
13
14
15
16
17
18
19
20
21
22
23
24
25
26
27
28
package com.fatesolo.filter;

import com.fatesolo.util.Response;
import org.springframework.web.filter.OncePerRequestFilter;

import javax.servlet.FilterChain;
import javax.servlet.ServletException;
import javax.servlet.http.HttpServletRequest;
import javax.servlet.http.HttpServletResponse;
import java.io.IOException;

public class SessionFilter extends OncePerRequestFilter {

//拦截除了login外的所有admin请求, session不存在的自动跳转到登录页
@Override
protected void doFilterInternal(HttpServletRequest request,
HttpServletResponse response,
FilterChain filterChain) throws ServletException, IOException
{

String uri = request.getRequestURI();

if (uri.contains("admin") && !uri.contains("admin/login") && request.getSession().getAttribute("user") == null) {
response.sendRedirect(Response.PATH + "login.html");
} else {
filterChain.doFilter(request, response);
}
}

}

至此完成了全部的具体逻辑的实现。

6. 项目运行

1) 打开build.gradle,添加最后的项目依赖:

1
compile 'mysql:mysql-connector-java:5.1.8'
compile 'log4j:log4j:1.2.16'

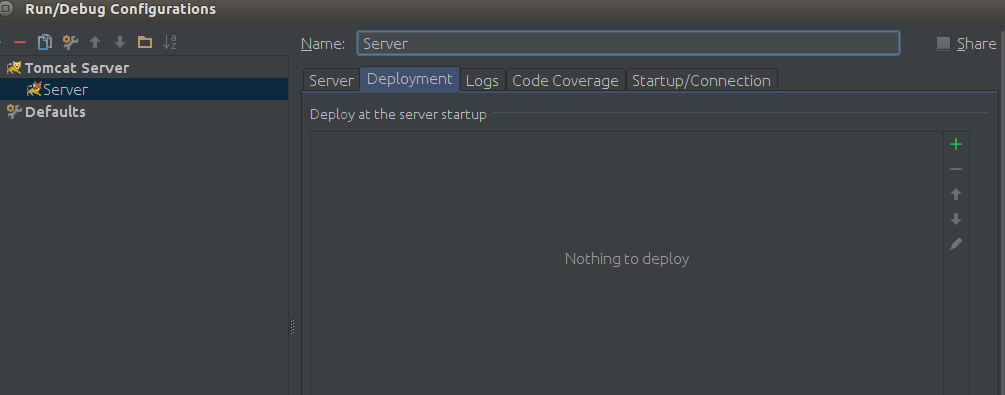
2) 点击Run菜单栏的Edit Configurations,点击绿色加号添加一个Tomcat Server,如图:
6

3) 点击右侧绿色加号,选择Artifacts,点击确定。

4) 右侧的Application context修改为/messageweb,点击确定。

5) 在MySQL中,选择TestDB,在user表中添加一个admin用户,密码请自行设定并使用MD5加密。

6) 打开Tomcat的conf/server.xml,将Connector修改为如下配置:

1
<Connector executor="tomcatThreadPool" port="8080" protocol="org.apache.coyote.http11.Http11NioProtocol" maxThreads="200" maxHttpHeaderSize="8192" emptySessionPath="true" connectionTimeout="20000" enableLookups="false" redirectPort="8443" URIEncoding="UTF-8"/>

7) 打开Tomcat的conf/context.xml,加入如下配置:

1
<Loader delegate="true"/>

8) 运行Tomcat,访问http://localhost:8080/messageweb/message ,得到如下JSON结果:

1
{"data":{"list":[],"url":"http://111.202.98.157/vkp.tc.qq.com/f0019r1sytg.mp4?vkey=C27DE1EE6C583432FF4CC7FD843718AA639A2E41506E0F4276B9640910029E7CEEDE7F98F1C5164339961BC63D3C6D22AF5EEE98F0583B42D719870F3372F77E2904AD01C82D3BE4D28B609CB7B4E75CEE88C408CC0707D3&br=62474&platform=0&fmt=mp4&level=0&type=mp4"},"resCode":"000000","resMsg":"成功"}

至此,项目已经搭建整合完成。


作者 [@FateSolo]
2016 年 2月 18日